Care and Love for Pro-Audio Equipment – Some Tips for Dynastar Fans
Greeting Dynastar Fans:
Yup you’re here again… Hope you are having a great day. Today let’s discuss care and feeding of your pro-audio gear…
Power amplifiers:
Power amplifiers should be operated in a shady spot, never put in direct sun when operating. If the temps outside are 100+ I’d have an external fan blowing on them – well away from misters. Most amps have cooling fans built in on them, but not all (Which I actually like) because it keeps dust bunnies out. If you heavily use a power amplifier say once a week outdoors, or in a smokey club, I highly suggest taking it in for service so it can be jet cleaned, and the controls treated. It’s very important to remove dust off the internal circuit board otherwise on a day where moist atmosphere gets into it, the dust gets wet, and wait for it…. KA-BOOM! Mushroom cloud! …. Irreparable… Welp there goes $1,200.00… Ouch. Keep’em clean and in a low stress environment. Lastly make sure the voltage and power availability is ample for the amplifier, or it will sag in performance, and even become damaged. If it is a 2kW power amp, make sure your A/C utility feeding it can deliver 2000 watts of power. NEXT!
Instrument amplifiers:
Here we have Bass Amps, Guitar Amps, Instrument Amps, Keyboard Amps. Tube amps take a beating when you roll them around with the tubes still hot. Jarring the amp with hot elements in the tubes does them no favor. Let things cool down 10 mins, then move them. Better to lift or use a hand truck if you can. Even rolling a solid state amplifier across a rough asphalt parking lot can wreak havoc on solder joints. Lots of amps nowadays are simply not ‘road worthy’.
Bass Amps tend to damage woofers, so keep an eye for torn edges on the speaker surround. Usually these combo amps tend to get scratchy controls (potentiometers) and need treatment from time to time.
Gently tighten input/output jacks protruding through the chassis all around. This goes for amp heads as well. If the jacks are plastic (and most are) be gentle when tightening. If the jam nuts keep spinning, it’s time for jack replacement. Take it in to your tech.
Always vacuum out the dust from behind your amp.. You’ll find guitar picks, change, paper clips, screws, notes and a plethora of treasures. Don’t insert a vacuum hose into the openings of the rear side woofer. Now if you need to clean the woofer front, and the grill cloth is removable, pry/unscrew it off and use a very soft bristle vacuum attachment on your vacuum hose, then gently vacuum the woofer’s cone and surround. Sometimes the surround has a sticky adhesive and will attract sand, dirt, and other stuff. We don’t like that. It could dig into the cone and prematurely damage the speaker. Vacuum it all off gently.
Effects pedals:
There is not much to these except battery damage. I don’t like batteries, so a power supply is always preferred. Now I suppose if the power supply catastrophically failed, it could damage your whole pedal board array, but I have yet to hear about that happening. When batteries leak, they can damage the clips, and you’ll need to have a service tech fix it. If it leaks on to the circuit board internally… it may not be worth fixing unless it is a beloved pedal.. Yes we have had customers put in big bucks for otherwise low valued pedals.. Hey I can understand that… Some things are special in life, and we understand. Sometimes we’ll absorb loss on a job like that to see a smile on the customer. Everything is not about money.
Loudspeakers:
The traditional non powered PA loudspeaker will often have an HF control on it, and may become intermittent and scratchy. That has to be professionally serviced, and at the same time the internal crossover inspected for damage. They often have melted components. Basically you want to keep things clean under the grill, and make sure the woofers, horn, tweeter have not accumulated dust. A gentle vacuuming can do the trick. Replace any missing screws. Instrument amp cabs can get the same treatment.
Now powered cabs are another story. The amplifier module needs to be removed and air cleaned. It is critical work, so best left to the professional tech. These PA cabs except in a few cases have no internal crossover. There are a lot of tiny sensitive components that can get damaged. Powered PA cabs are bi- amped or tri-amped, meaning the amplifier module takes care of feeding the correct signal to each specific driver.
Cables:
Cables eventually wear out, but good quality braided type can last an awfully long time and take a beating. If the 1/4” plugs start showing brass under the nickel plating, get rid of them.
It is a good idea to lube the plugs with Caig D5, or Gold contact cleaner. This helps lubricate the plug mating with the jack, and ensure a good connection.
Now there are a plethora of cable types – MIDI, 1/4”, 1/8” XLR, DIN… and you name it Any metal
to metal connectors can be very lightly lubricated with Caig Gold contact treatment. Once applied, connect and disconnect several times to exercise the contact and spread the compound into the connections to ensure good contact. If a cable is noisy when connected, it probably is internally broken. Try another. If good, toss out old. NO! don’t keep it around. It may bite you in the butt one day.
Now specialty cables for special equipment like Recording consoles, or Tape Decks can be rebuilt. Take it to a tech for analysis.
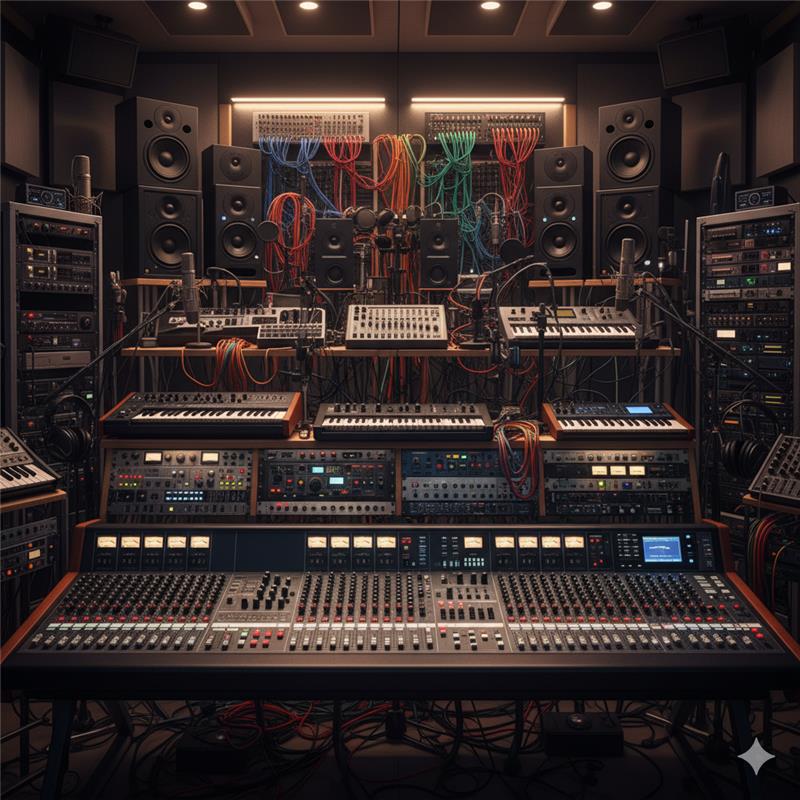
Mixers:
Mixing Consoles, small mixers- Ahh.. A million controls on your traditional mixing console. Okay… a $60 mixer… just toss the darn thing out. Now a larger mixer will need to be taken in for service if you have scratchy controls. If everything is working okay, and you just want to service it yourself, take a 1/4” plug on the end of a cable if you like, and put a very quick spray of Caig D5 into each jack, then insert the plug into it, and pull it out and in three or four times to exercise the jack. You may have many jacks, so this may take an hour or so. Now go back and do the same with the XLR jacks both male and female. Finally wipe the faces of the XLR jacks so that the cleaner does not get all over the place. Use the spray treatment sparingly. The idea here is to simply coat the metal parts inside of the connectors, not wash down the plastic and everything else.
Now traditional larger consoles need to be serviced by removing each channel from the top. Each channel is individually serviced. It can make things easier, and you can also get to the controls. I really feel more comfortable having a pro-audio tech do this, because you may damage ribbon connectors deep within the chassis, and the ribbon connectors also needs to be serviced as well. These kind of consoles are diassapearing but parts of country and world still swear by them because of their famous preamplifier circuitry (Think Rupert Neve)- Especially for recording.
It’s also good to check each channel with a handheld signal generator to make sure all faders and settings are balanced with each other, so set each channel identically, and run a signal into each channel, and check them. If they fail, off to the shop it goes for service.
For digital consoles, if you have mechanical faders on them such as Yamaha’s, those faders do not actually pass an analog signal. Instead they are voltage controlled (VCA) and tell the processor what position the fader is in and the processor adjusts the gain accordingly somewhere else within the electronics. If these faders act up, erroneous digital data will be fed into the processor and the mixer can go boofoo and not output the correct audio level. Usually these faders need to be replaced, especially if they are motorized. A tech should take care of this because they also need to be calibrated with each other. Usually when one fader starts to go south, the rest will soon follow, so best to replace the whole set. Digital mixing consoles are expensive, so it is reasonable for the repair cost on these to reflect that.
Tape decks:
These aren’t used much any more with digital recording technology around, but the cork sniffers still exist. Clean the pinch wheel, and clean the recording and erase heads with a head cleaning kit. If the pinch wheel has hardened, you have a few choices. You can use a ‘Rubber Renew’ type product to restore the softness of the pinch wheel, or simply replace it. Both methods have advantages and disadvantages. You’ll also need to lubricate the unit per operation manual, but do not go any deeper without having a tech do it. If you can find it, a test tape is necessary to test the channels for frequency response, channel separation, etc.
Keyboards:
Yay! Keyboards really don’t need much maintenance except for keeping the keys clean and servicing the jacks, midi connector, power jack, etc. Check to make sure the power adapter (if one) does not have a kinked wire or intermittent connection. A lot of keyboards have a hook next to the power jack to loop the adapters wire around so you do not break the jack off the circuit board inside. Any keys not enunciating correctly needs to be taken in to a tech to have the contacts evaluated. Keep the top clean, and cover the unit when not in use! You can use a soft brush like for a camera lens to clean the display. Use a wet wipe to clean dried spit from over zealous singers off of the surface and display.
Studio peripherals, and all the rest:
Okay all the rack mount stuff like preamplifiers, effects, studio power supplies, equalizers, and you name it, need to be benched for maintenance. Rubber membrane push buttons, potentiometers, jacks etc. need to be professionally serviced.
Lighting & Stage stuff:
For small stage lighting systems check all A/C cables for frayed wires, and enjoining cables from broken connectors. If any lights act erratic, treat the contacts and see if it helps. For Gobo’s, and lasers, DMX controllers, leave that to a tech. With Led technology now, power draw from the wall is not so critical anymore, but still, ensure you have a good extension cord and that the power delivered is quality. DJ’s pay attention here.
Have I missed anything? Let me know.. I love to help!